

Configure your router's dynamic DNS feature to keep your Dynamic IP updated automatically, using the exact values shown for your device. This article is for anyone setting up that connection for the first time, or moving it to a new router.
Overview
- The Setup tab of your Dynamic IP already shows the exact values for your device — pick your device there and copy each one across.
- This article covers where those boxes live on common routers, and the quirks worth knowing before you save.
Before you start
- Open Dynamic IPs, select your Dynamic IP, then go to the Setup tab.
- Choose your device at the top of the tab.
- Keep that tab open — it watches for your router and tells you the moment it gets through.
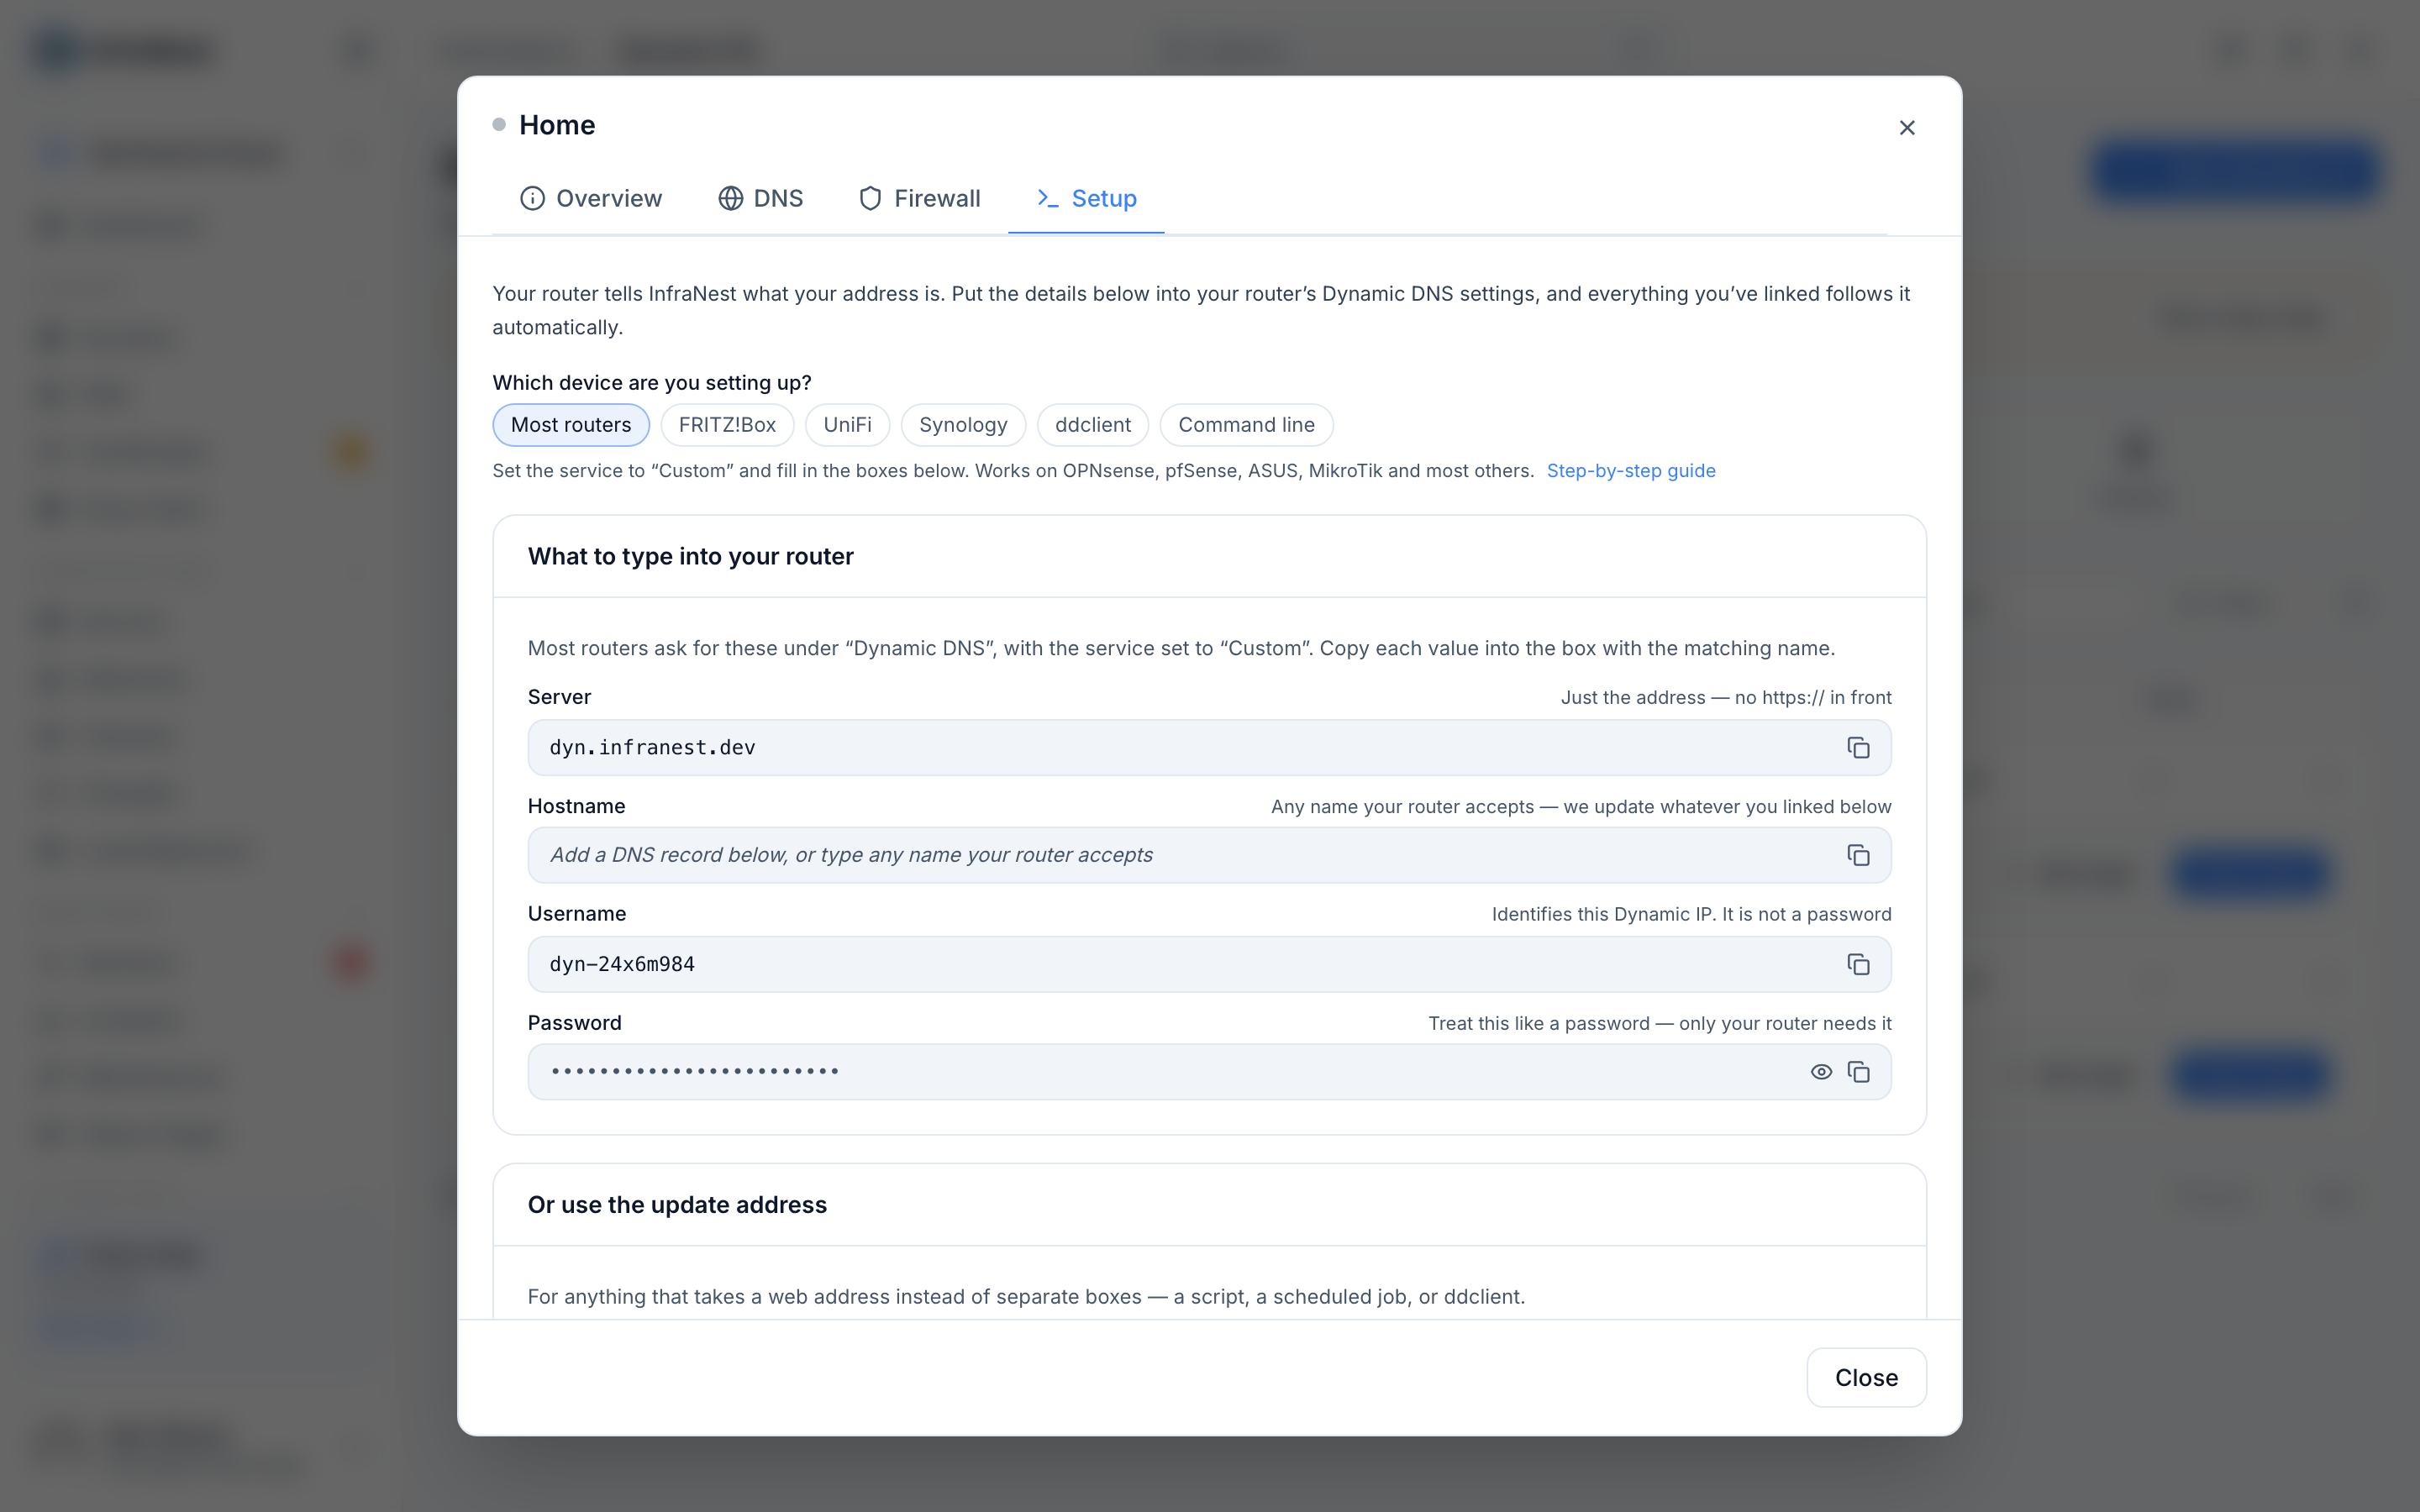
Three things trip people up on nearly every device:
- No
https://in the Server box. Routers add it themselves. This is the most common cause of "it just doesn't work". - The Hostname box is for your router's benefit, not ours. It won't save without one. Type the name you're keeping up to date; we update whatever you linked in InfraNest regardless.
- The Username is not a password. It's the
dyn-…value, and it identifies which Dynamic IP is calling. The password is the separate, hidden one.
Set up most routers (OPNsense, pfSense, ASUS, MikroTik, TP-Link, Netgear…)
Look for Dynamic DNS, DDNS, or DynDNS — usually under Internet, WAN, or Services.
- Set the service or provider to Custom (also called "User-defined" or "Other").
- Fill in Server, Hostname, Username and Password from the Setup tab.
- Save.
TipIf your router offers a "force update" or "update now" button, use it — otherwise it may wait until your address next changes.
Set up a FRITZ!Box
- Go to Internet → Permit Access → DynDNS.
- Choose Custom as the provider.
- Copy the Update URL from the Setup tab exactly as shown — it contains
<ipaddr>and<ip6addr>placeholders that the FRITZ!Box fills in itself. Don't replace them with your own address. - Fill in Domain name, Username and Password from the Setup tab.
Set up UniFi (UDM, Dream Router, USG)
- Go to Settings → Internet → Dynamic DNS.
- Select Create New Dynamic DNS, and set the service to Custom.
- Copy the whole Server value from the Setup tab, including everything after the first
/— UniFi's Server box takes the address and a path together, which is why the Setup tab shows a longer value for UniFi than for other devices.
Set up Synology DSM
- Go to Control Panel → External Access → DDNS.
- Select Customize provider.
- Copy the Query URL from the Setup tab, leaving its
__HOSTNAME__and__IP__placeholders alone — DSM replaces them itself. - Add a DDNS entry using that provider, with the hostname, username and password from the Setup tab.
Set up Ubiquiti EdgeRouter, or anything running ddclient
- Choose ddclient on the Setup tab.
- Copy the complete configuration block it shows.
- Paste it into
/etc/ddclient.conf(or the equivalent) and restart the service.
No dynamic DNS setting at all?
Some routers don't have one, and some ISPs supply locked-down hardware. You have two options:
- Run the update from a computer on the same connection instead — see Update your IP from a computer.
- Use any other device on the network that does have DDNS support (a NAS, for instance). The address it reports is the connection's, not the device's, so it doesn't matter which one calls in.
Troubleshooting
If it's not working, start with Dynamic IP isn't updating — it's organised by what you're seeing, not by device.
Was this article helpful?
Related articles
About Dynamic IPDynamic IP keeps your DNS records and cloud firewall rules in sync with a changing public IP address.Update your IP from a computerWhen your router can't do dynamic DNS, any computer on the same connection can do it instead — on a schedule, in the background.Dynamic IP isn't updatingWhat to check when a Dynamic IP isn't doing what you expect, organised by what you're seeing.Set up Dynamic IPCreate a Dynamic IP, tell your router where to send updates, and choose which DNS records and firewall rules should follow your address.