

Automations let InfraNest react to things happening in your infrastructure without you lifting a finger. This article explains what a rule can watch for, how to narrow it down, and what it can do once it fires — handy for anyone setting up their first automation.
Overview
- A trigger is the event that starts a rule (for example, a certificate expiring).
- Conditions let you narrow when the rule actually runs, so it only fires for the situations you care about.
- Actions are the steps InfraNest carries out once the rule fires — you can chain more than one.
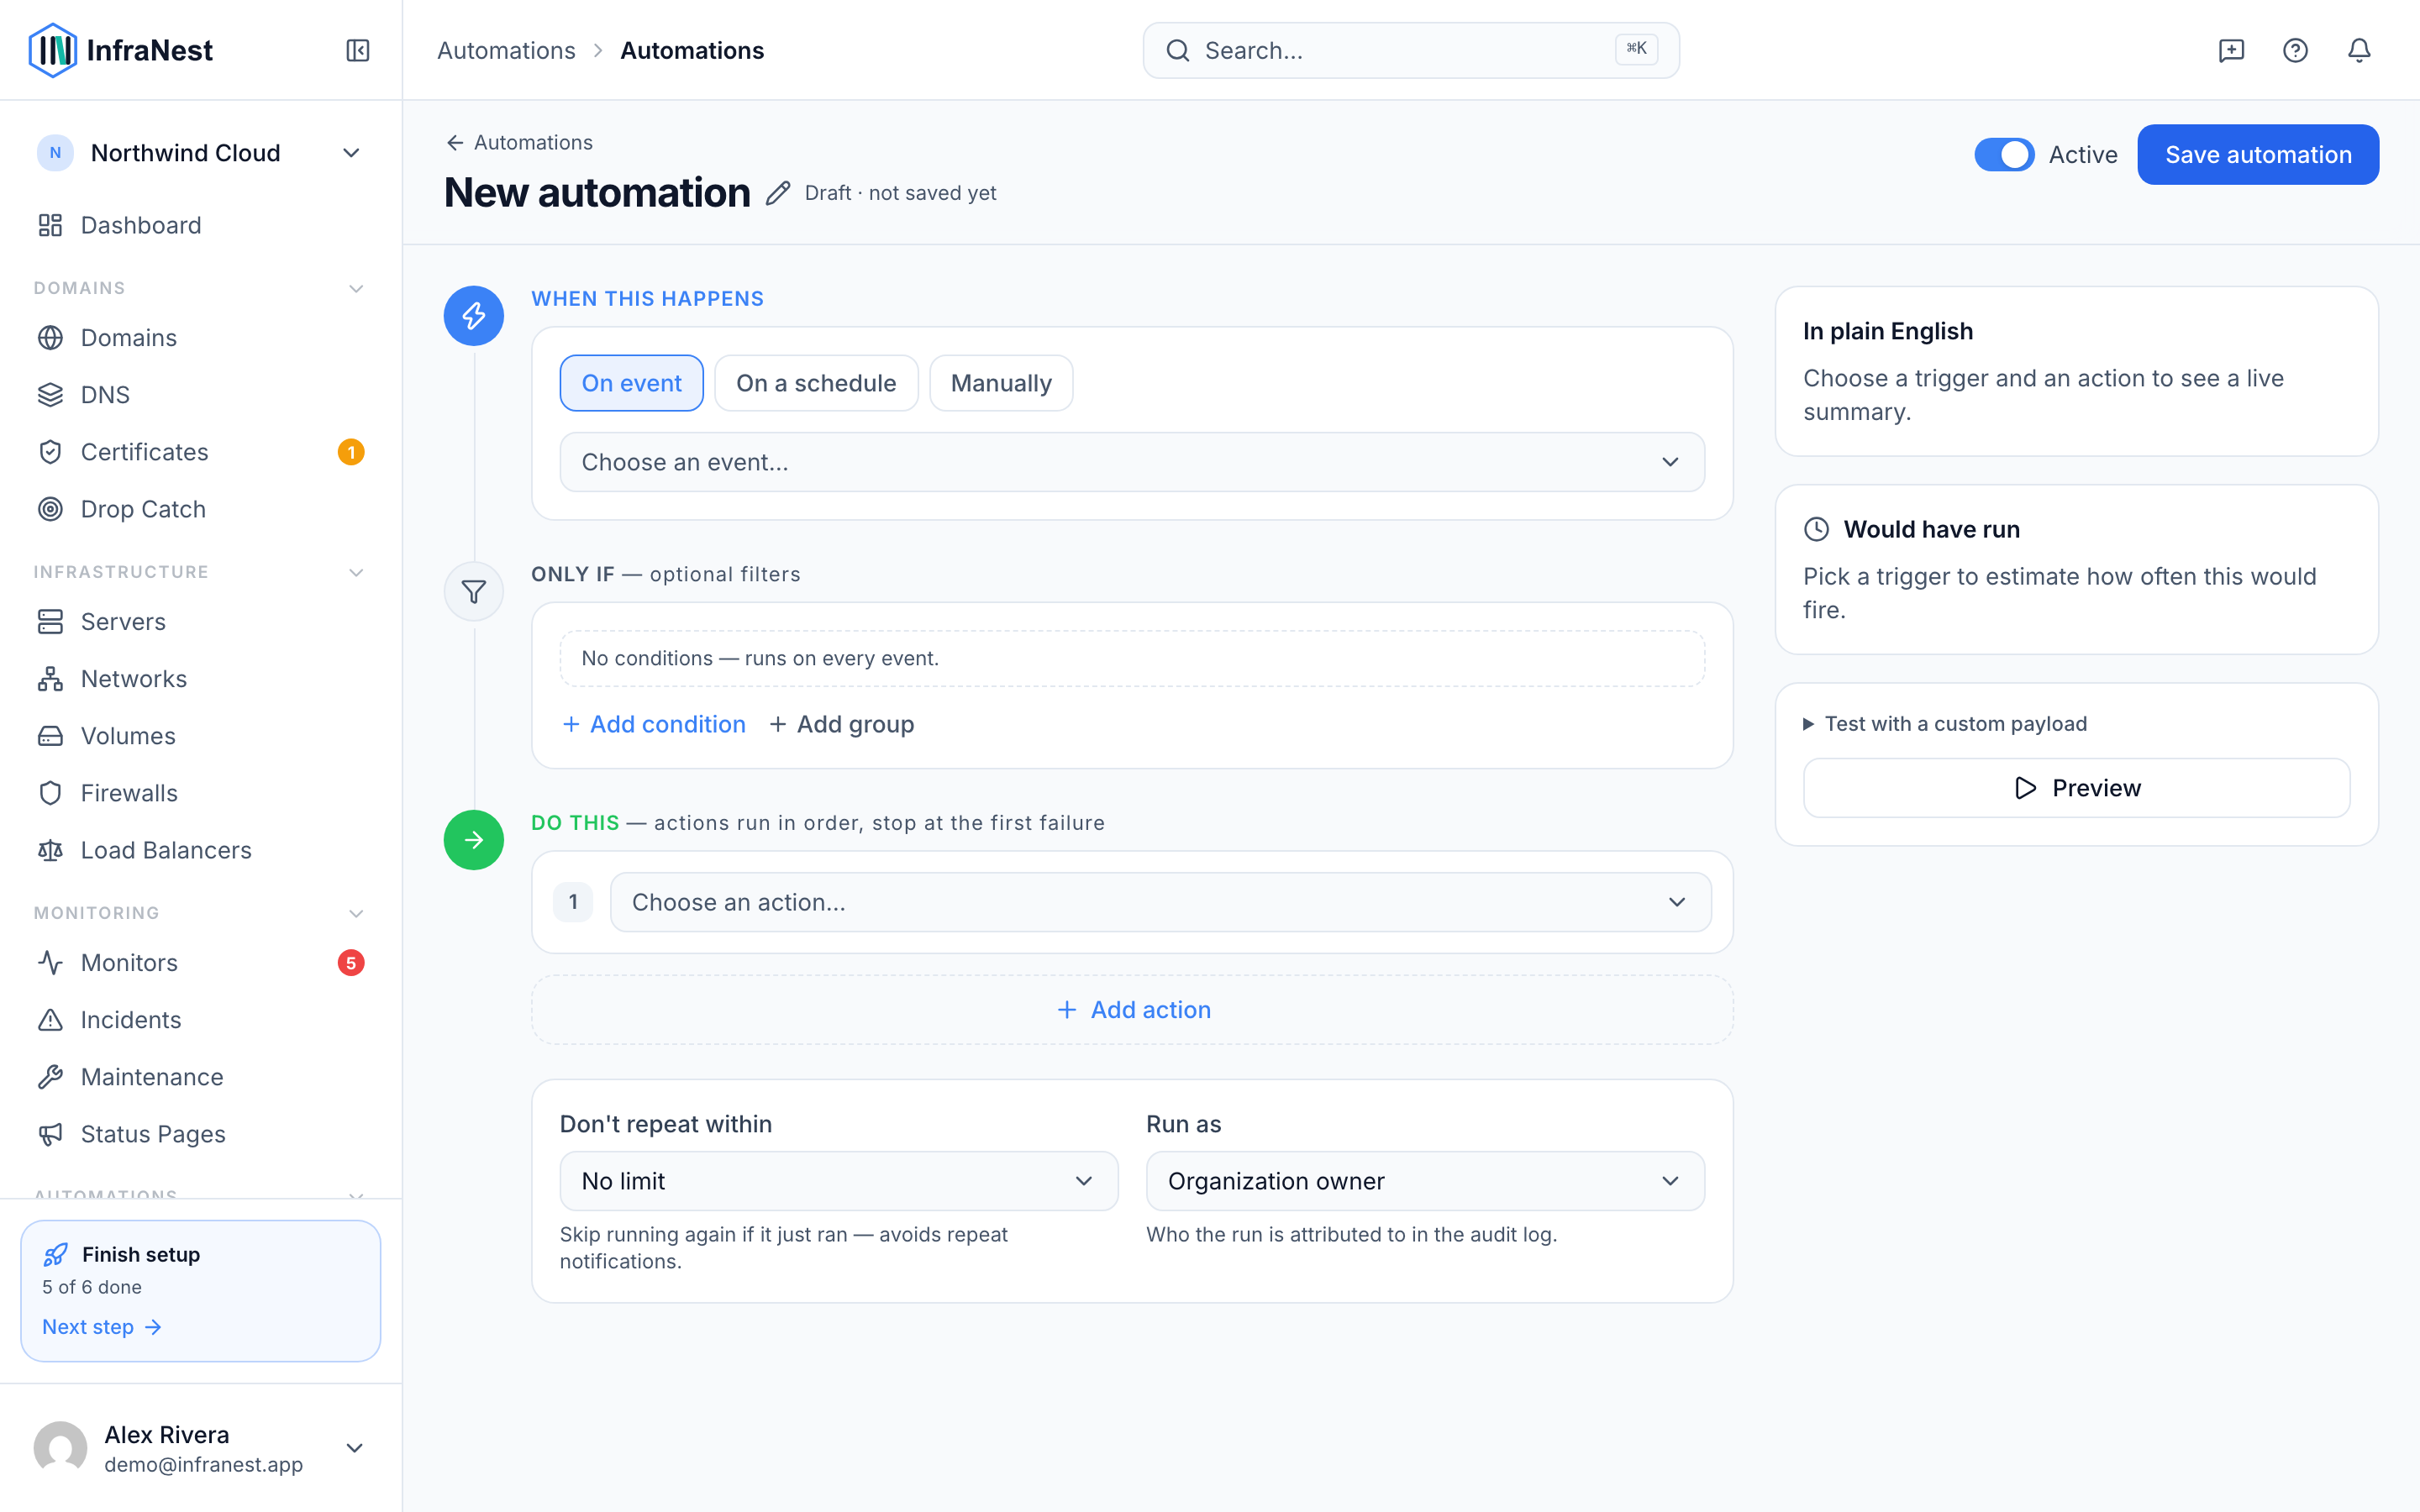
Choose a trigger
- Start a New automation and pick On event as the way it starts.
- Use Search events… or browse the categories below to find the event you want to react to.
- Select the trigger that matches. The main categories are:
- Domains — a domain is registered, expiring soon, changes status, is renewed, or is deleted.
- DNS — a zone's records change, or a specific record is created, updated or deleted.
- Servers — a server is created, its power state changes, or it's deleted.
- Monitoring and incidents — a monitor goes up or down, or an incident opens or resolves.
- Certificates — a certificate is expiring, has expired, changes on an endpoint, is weak, or an unexpected certificate is found.
- Maintenance — maintenance is scheduled, starts, or completes.
- Drop-catch — a watched domain is dropping soon, becomes available, is caught, or an attempt fails.
- Dynamic IP and status pages — a dynamic IP changes, or someone subscribes to a status page.
Narrow it down with conditions
- In your automation, select Add condition.
- Choose the Field you want to check (for example, Days until expiry or Status).
- Pick an Operator such as equals, contains, greater than, is one of, or is not set.
- Enter the Value to compare against.
- Add more conditions if needed, and choose whether Any or Match — of these conditions — must be true.
- Leave conditions empty if you want the rule to run on every matching event.
TipSome useful examples: a domain with fewer than 7 days left, a monitor that went down (not up), a specific record type or DNS provider, or a certain tag on the affected object.
Add actions
- Select Add action to choose what happens when the rule fires.
- Pick from the available actions, including:
- Notify and tag — Send notification, Call webhook, Add issue labels, Remove issue label.
- Monitoring and incidents — Start monitoring, Acknowledge incident, Resolve incident.
- Maintenance and status — Open maintenance window, Complete maintenance, Post status-page announcement.
- Domains, DNS and certificates — Set nameservers, Set auto-renew, Create DNS zone, Apply DNS template, Link certificate.
- Integrations — Sync integrations.
- Fill in the fields for that action (these vary — for example, Send notification asks for Send to, while Call webhook asks for URL, Method, and optional Payload (JSON, optional)).
- Select Add action again to chain additional steps, or use If / branch to run different actions depending on a condition.
- Select Save automation when you're done.
NoteYou can test your setup before relying on it — use Test run or Test run with sample event to see a Dry-run result without affecting anything live.
Tips
- Use Preview (dry run) to check how many events would have matched recently before turning a rule on.
- If you're not sure where to start, try Start from a template in the Template library instead of building from scratch.
Was this article helpful?
Related articles
About automationsAutomations let InfraNest react to things happening across your infrastructure on its own.Automation conditionsConditions decide when a rule actually runs. Without them, a rule runs on every matching event; with them, it runs only when the event's details match.Automation examplesA few ready-to-copy automations to show what's possible. Build any of these under Automations → New automation, or start from the Templates tab.Placeholders and formattingPlaceholders let an automation drop live details from the event into a message, title or webhook — so instead of a generic "A certificate is expiring" you…